H&M Blind Hack: A How-To, No Sew Tutorial
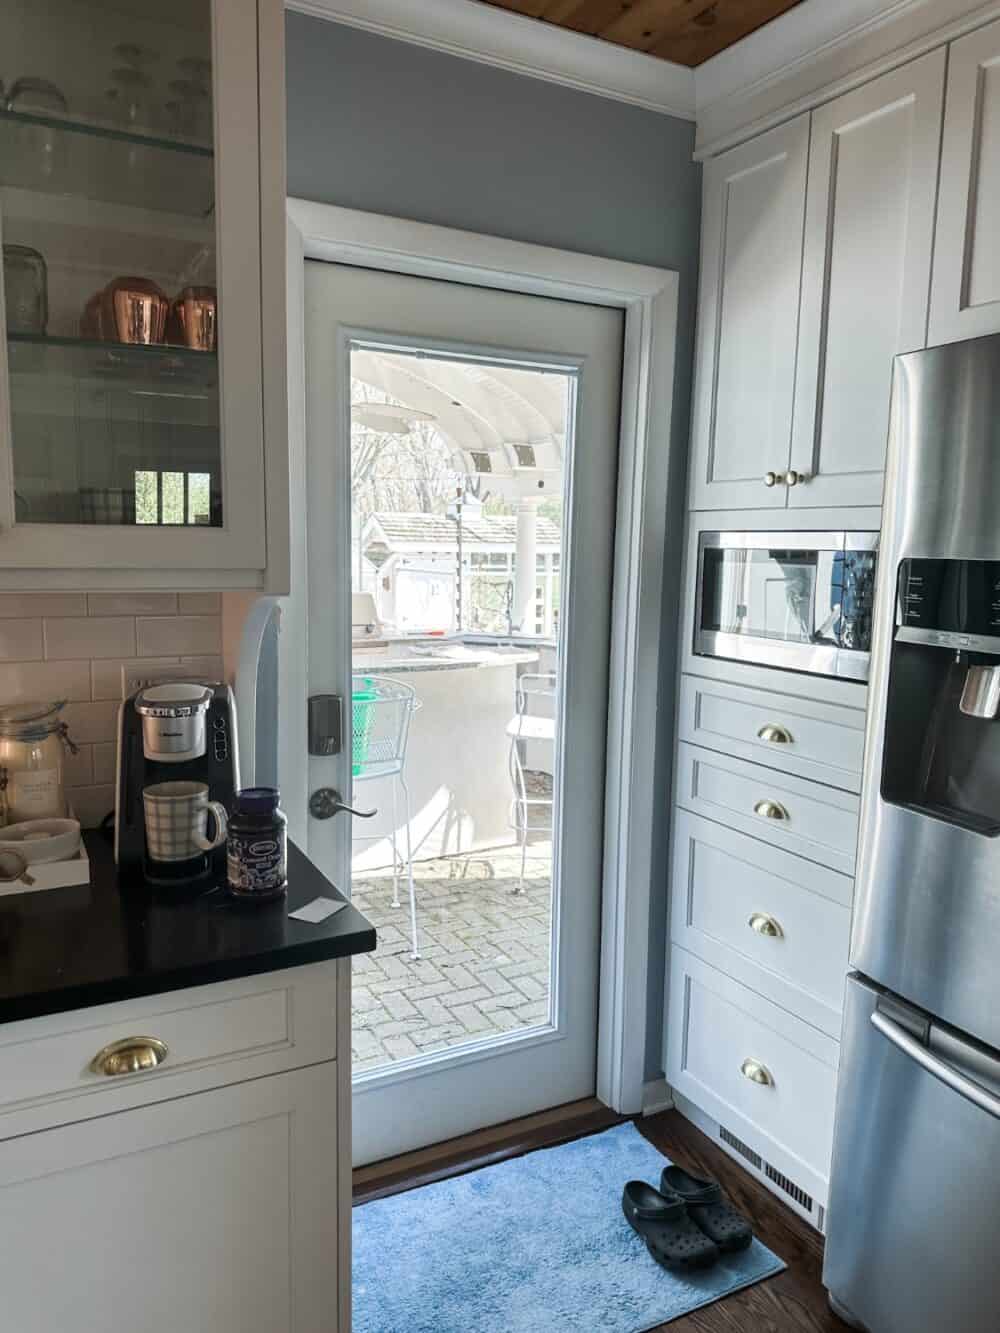
About a year ago I saw some simple blinds that I thought would be perfect for my all-glass kitchen door. I found out they were from H&M and they were only $19.99. Unfortunately, they were out of stock. I kept checking back and they were always out of stock.
I knew that they wouldn’t be hard to replicate so I put that DIY project on my to-do list.
On my blog Living Large in A Small House, I may sometimes use affiliate links, which means a small commission is earned if you purchase via the link. The price will be the same whether you use the affiliate link or go directly to the vendor’s website using a non-affiliate link. You can find my full Disclosure Policy HERE
Planning The Project
When I finally got around to making them and I analyzed how I was going to tackle the project, I realized that I probably could make this no-sew window treatment. I knew if I did a really good job of measuring and cutting my material out in a perfect rectangle, I would be able then hem it with stitch witch. Once I had it all hemmed I just needed to make a pocket at the top for a small tension rod. Easy enough.
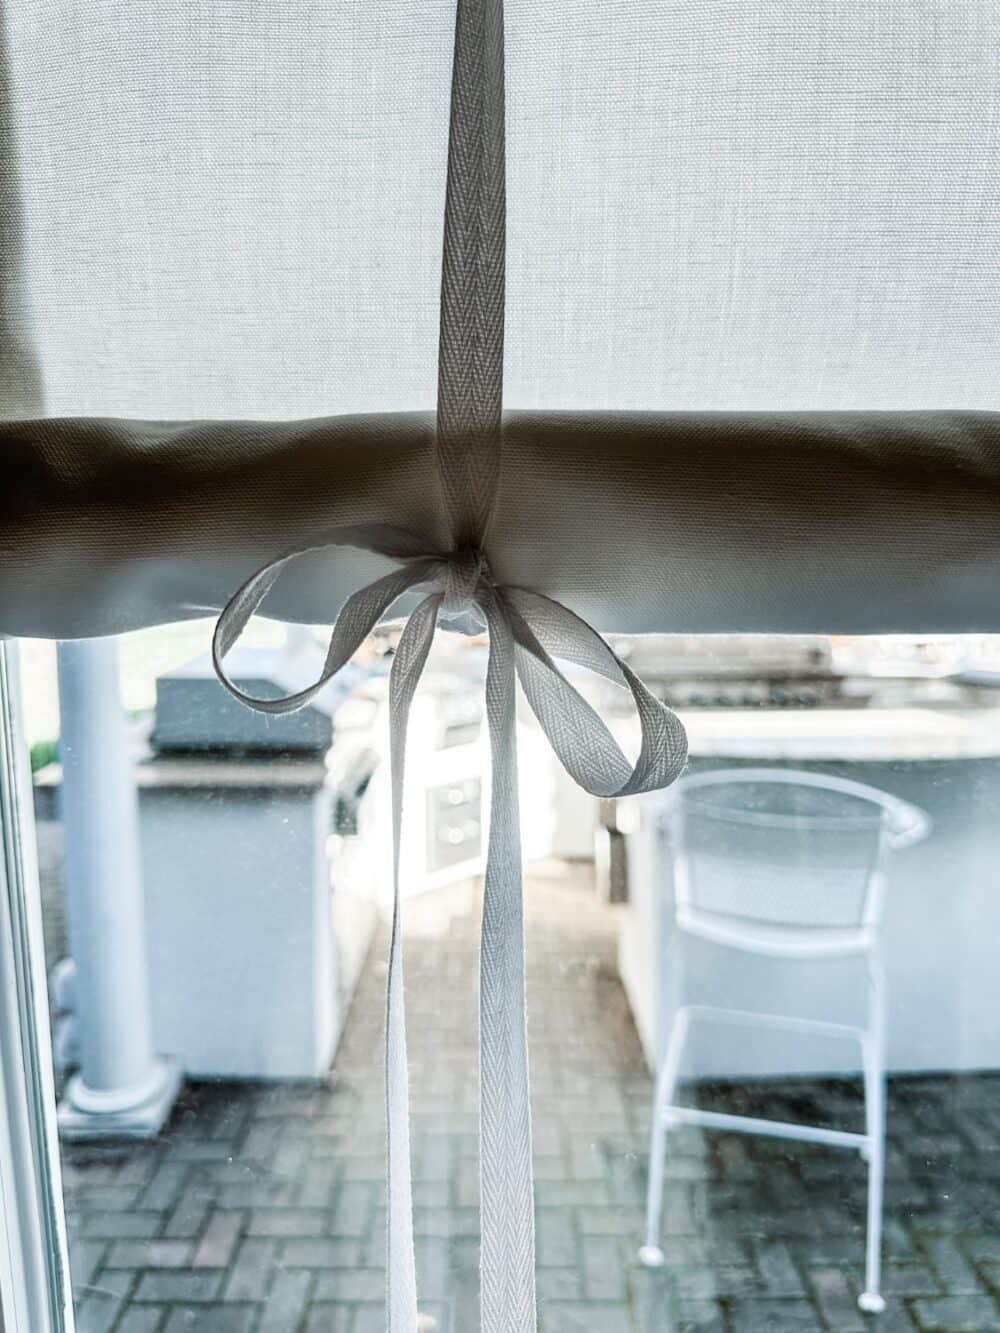
Then I just had to figure out how to attach twill tape to the top so that the blind could be rolled up and become the perfect blind for my glass door. Turns out I could do it with the stitch witch tape.
The whole project took me about an hour.


Supplies for the H&M Blind Hack
Next, I checked to see what I had in stock. These are the things I needed:
- Fabric – I have two yards of white fabric left over from my dining room chair cushion reupholstering project.
- Measuring Tape – I used a regular metal tape measure. In hindsight, I should have used by fabric tape measure
- Sewing Measuring Board – This makes cutting and measuring so much easier
- Straight Edge – I used a drafting triangle but you could use any long straight edge
- Blue sewing pencil or a regular sharp pencil
- Sewing Scissors – If you don’t have sewing scissors, any sharp pair will work
- Iron and Ironing Board
- Small tension rod (if it’s an inside mount) or a small curtain rod if an outside mount
- Heat Bond Hem Adhesive (you could probably use fabric glue but the hem tape is less messy)
- Cotton Twill Tape Trim
I happened to have everything in stock except for the tension rods. I ordered them from Amazon and had them the next day.
If you don’t have fabric on hand, you could also consider using flat sheets for your shades. It’s an inexpensive way to create window treatments.

Full Step-By-Step Tutorial
I’m going to give you my step-by-step instructions of how I made these H&M Blind Hack.
Measuring your Window
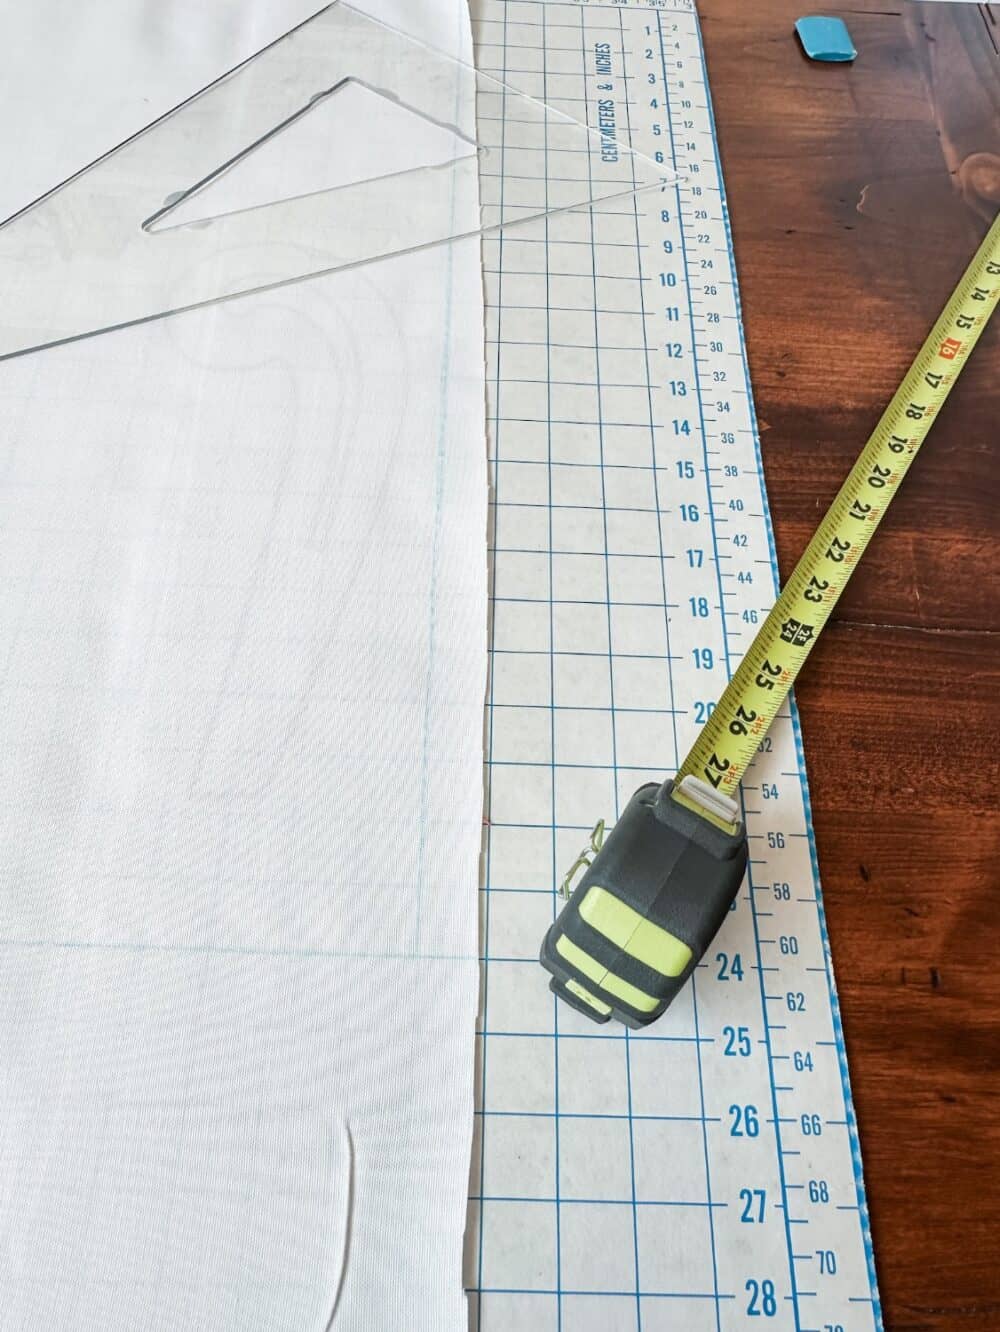
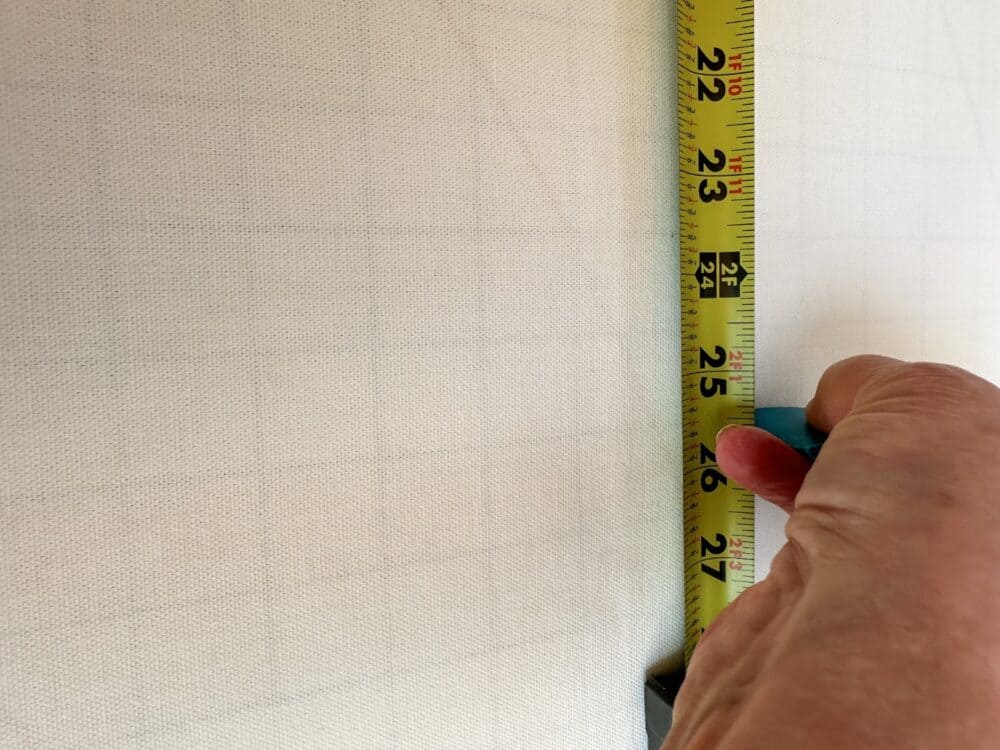
Using a tape measure I measured my window dimensions to exact measurements. I want my curtain panel to be completely flat so I’m being precise. After I measured the inside of my windows, I added four inches to my width as I’m going to make a double-folded hem that will be one inch on each side when finished.
To the length, I added 2″ for the hem on the bottom and 3-1/2″ for the pocket at the top. While these are long curtains that will cover the entire window when unrolled, you might just want the look of a rolled window treatment at the top of the window. If you don’t plan to unroll the blinds then you probably don’t need the fabric to be as lengthy.
Cutting the Fabric
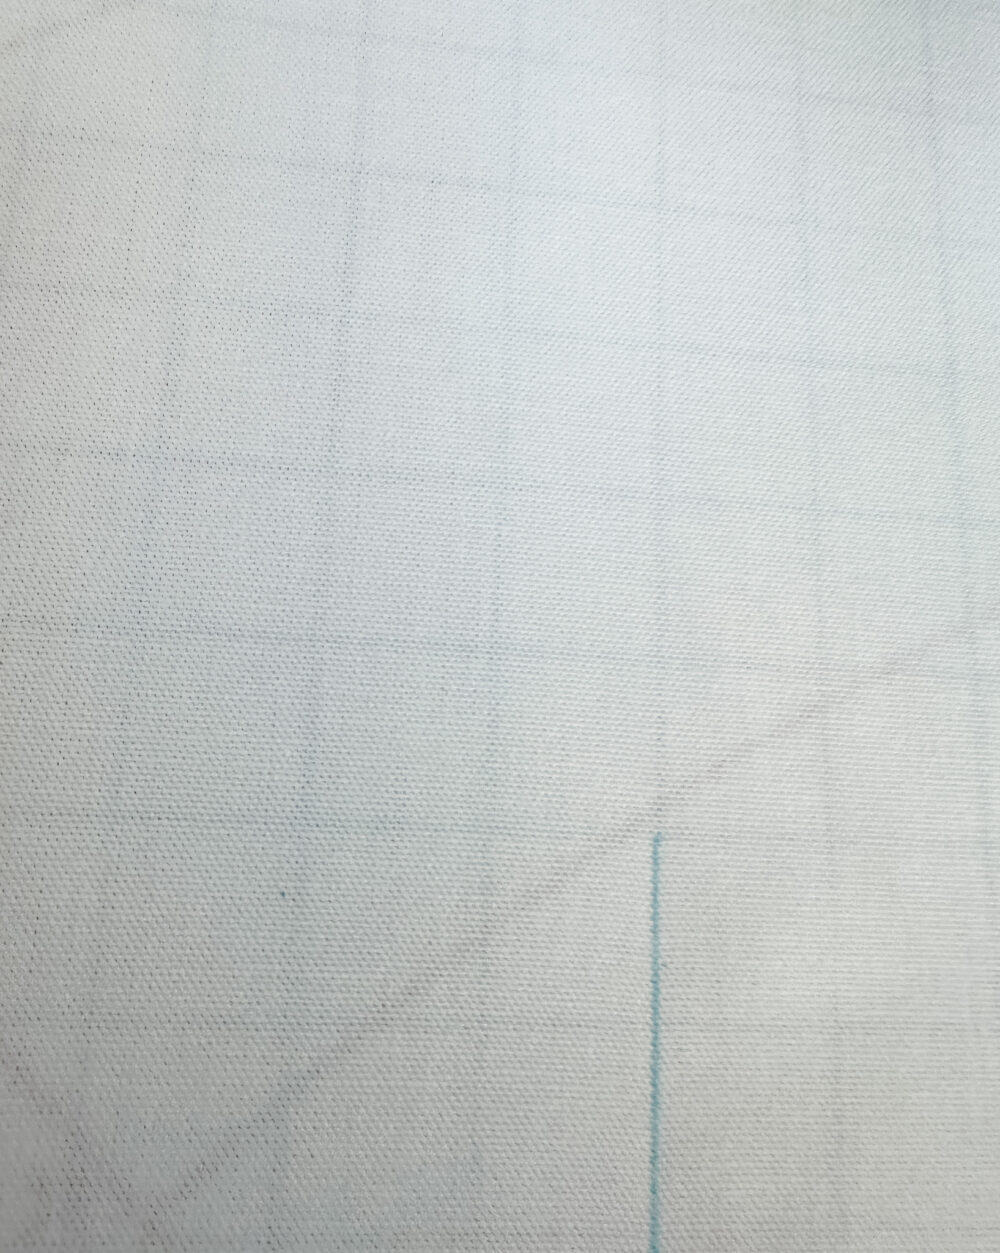
I laid my fabric flat and square on my sewing board. Once I had it all lined up on one edge, I measured it very precisely and used a straight edge and a blue sewing crayon to create an exact rectangle. Then using my sewing scissors, I carefully cut the fabric. If you decide to use sheets, you can eliminate a step by using the original hem of the sheets as the bottom edge.


Hemming the Material
For the next step, I started on the long edges and ironed a one-inch fold. Then I cut a piece of 5/8″ hem tape the length of the drapes. I used a stick pin to help hold the fabric and tape in place. Then using a hot iron, I adhered the 1″ raw edge to the tape. I let the iron rest on each area for about 8-10 seconds as I moved down the length of the fabric. Next I folded that edge over 1″ again to make a nice clean hem. I ironed it down to make a fold. Then using another piece of 5/8″ hem tape cut to length, I once again pressed the fold to adhere the tape. I went over the hem several times as the head had to go through two layers of fabric this time and it needed a little more heat for it to adhere.
I then repeated the same thing on the other length and then the bottom hem.


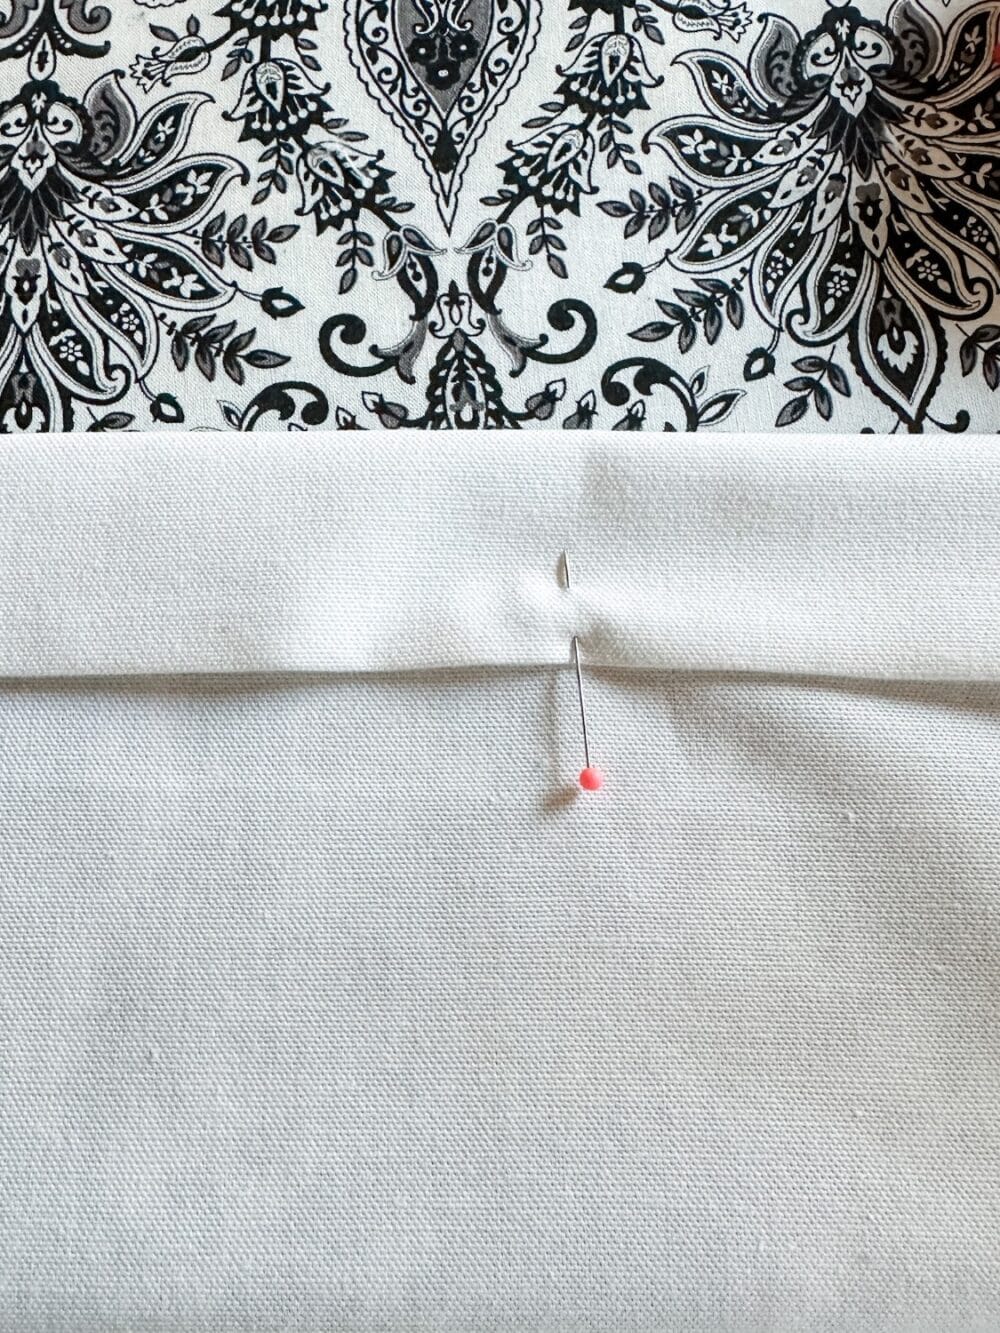

The Rod Pocket
For the rod pocket, I folded the raw edge over 1″ and pressed it. Then I cut a piece of hem tape to the width of the blinds and after folding the material again to a measurement of 2-1/2″ I adhered the folded raw edge to the fabric.
My measurement of a 2-1/2″ pocket was based on my rod was 2″ wide. I could have made it a hair bigger. It was a tight fit.

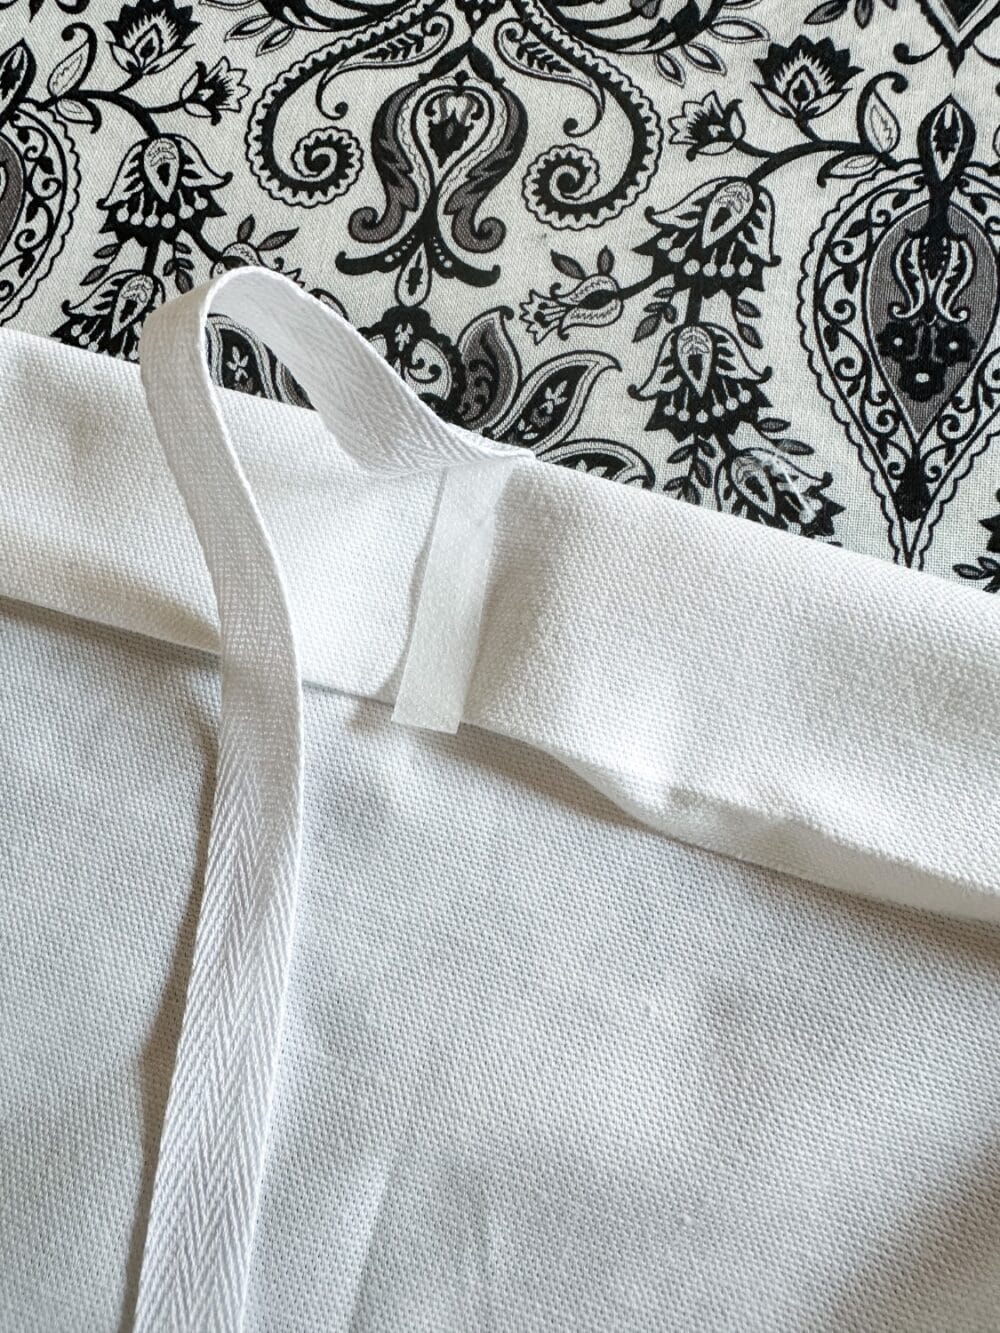


The Ties
I attached the ties 6″ in from the end but that might change if you had a wider window. You might need more than two ties. I attached these with the same hem tape. I just cut the tape in half lengthwise. Then put the tape under the ribbon on both sides and secured it with the hot iron.
Choosing Fabric
As I mentioned I used the white fabric that I already had in stock. It is a cotton duck fabric and has a bit of weight to it which helps with the stability. I also had another print fabric that I considered but I didn’t want the back side to be seen when it was rolled up. There are however fabrics that the wrong size and right side look very much the same which would work well. You could also line the inside with another layer of the fabric.
As I mentioned before, you could use white sheets for this project.
Another option might be lace which would create sheer curtains to give you a more romantic look. I think this might be a great option for a bedroom window.
Different Types of Blinds
Roman Shades
While this blind would be considered a version of a Roman shade, they typically are more complicated and roll up in a more pleated look. In our primary bedroom, we have wooden slat Roman shades. In that treatment, we also have side panels to give the illusion of height to the space.

Cellular Blinds
In most of the other windows in our home, we have cellular blinds. They are in the rooms where we only use them for privacy or light control.
Venetian Blinds or Slated Blinds
Slated blinds can be made out of plastic, metal, or wood. I personally love wooden blinds. You can get them with horizontal wooden slats in different slat sizes. I like the thicker slats which give that look of a plantation shutter without the cost. With slated blinds, you can control light and privacy and still can see out, if you desire.
My DIY Projects
If someone asked me I would tell them I’m not much of a DIY person but that isn’t true. I’ve made my own curtains most of my adult life. I transformed a Goodwill lamp last year. I have reupholstered the furniture in our outdoor living room. We’ve made several deconstructed wing chairs. Two are in our outdoor living space and one is in our daughter Emma’s Apartment in Chicago. One of my greatest DIY was a chair that I painted and reupholstered in the Fall 2022 One Room Challenge.
This project was a pretty quick one I wish it hadn’t been on my to-do list for so long. It was the easiest way to make a huge difference by adding these window coverings to my wide open door.
I hope this easy tutorial will encourage you to give these DIY shades a try. If making it yourself is not your thing, I have a surprise for you. The H&M curtains are back in stock and they are only $19.99. Hardly worth the trouble of making your own. However, buying them will only work if the sizes and colors coordinate with your room’s look.
Peace and Love,

Meet Me
I’m an Interior Designer, Professional Organizer, and Party Planner who lives in the suburbs of Chicago in a 1,300 sq., ft., home with my “Handy” husband, Keith.
I’m an open book about my life on my blog. Find out more about me by tapping the button below.
Thanks for Following Along
If you enjoyed this post I hope you sign up to be a friend of Living Large in A Small House! Then you won’t miss any of the inspiration that is shared with you each week! You can also follow me on Instagram, Facebook, and YouTube. I share even more inspiration on Pinterest! You can listen to me chat on my Podcast.


A great way to save this article is to save it to your Pinterest boards. You can find the pin button in the top right corner of the photo below. Also, don’t forget to follow me on Pinterest


Featured


Web Story