How to Customize a Greenhouse Kit from a Big-Box Store
Creating a DIY greenhouse with an Aluminum kit is a great way to give your hobby greenhouse a more customized look. You can not only make it more attractive, you can make it more functional by creating more headroom in a small greenhouse.
Aluminum framed greenhouses are a popular option for gardeners who want to add a green house to their property without breaking the bank. However, these greenhouses can be a bit basic, and many people want to customize them.
On my blog Living Large in A Small House, I may sometimes use affiliate links, which means a small commission is earned if you make a purchase via the link. The price will be the same whether you use the affiliate link or go directly to the vendor’s website using a non-affiliate link. You can find my full Disclosure Policy HERE
Purchasing Your Greenhouse Kit
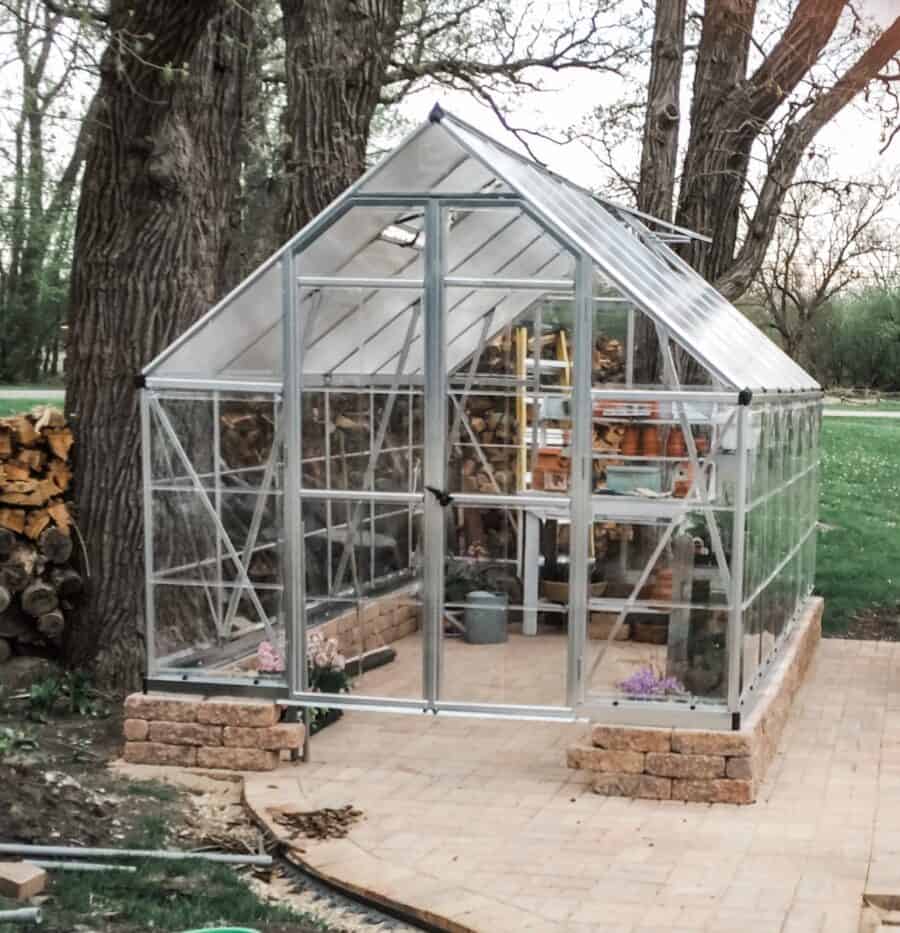
We purchased a Palram Canopia Balance 8 ft. Series Greenhouse greenhouse from Costco but there are many options available from both big box stores and a garden center. They also come in both silver and green and many different sizes and designs.
“Handy” did his research before making our purchase. The brand we bought has polycarbonate panels with high ratings for withstanding high winds, cold weather, and heavy snows which are things that we deal with in Illinois.
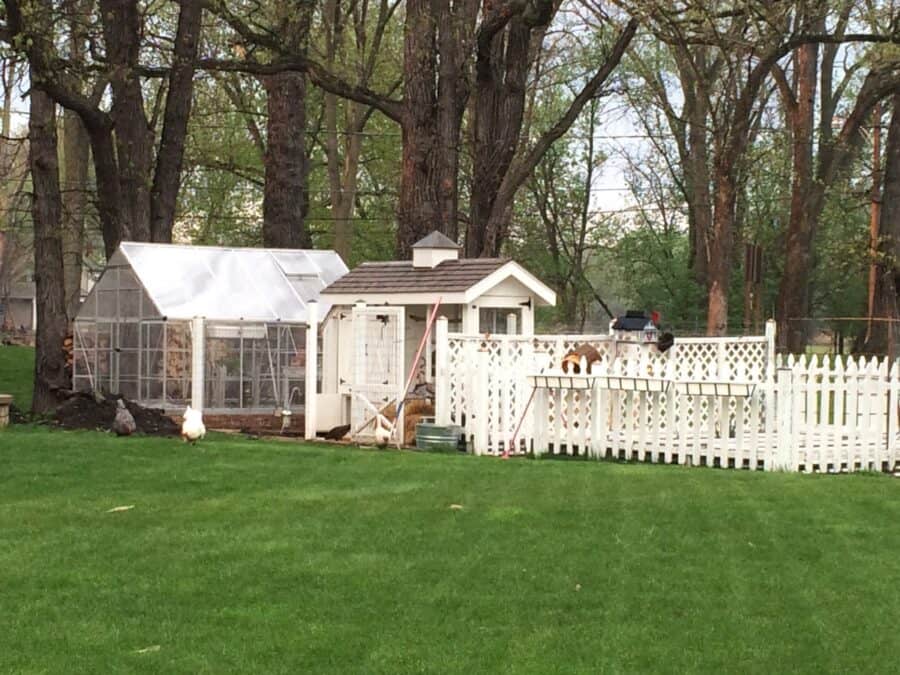
We chose a greenhouse that is 8 ft wide with the length of the greenhouse being 12 ft. It’s the perfect size to tuck in between our chicken coop and some large oak trees.
There was also an option to purchase at an additional charge, solar operating window openers. We added that option to our purchase. It was the best choice for us.
In addition to the aluminum greenhouse kits, there are plenty of options for greenhouses in other materials.
Once we purchased the greenhouse, Handy ordered the materials we needed to customize the floor and base. He also prepped the location. The lead times I’m sure are different now but I believe we waited 30 – 60 Days between when we ordered the greenhouse and when it was delivered.
Choosing Your Location and the Size of Your Greenhouse
We spent a lot of time trying to decide where to put our greenhouse. We ended up putting it in line with our chicken coop and fenced vegetable garden. It gives a cohesive outdoor garden area look to our space.
I was concerned that the site where we put it might be a bit too shady for a greenhouse but as it turns out, it’s absolutely perfect.
The greenhouse is warm in the winter months when the trees don’t have any leaves and it is hot during the growing season even with some shade. I’m actually so happy we didn’t put it in direct sunlight.


Customizing Your Greenhouse
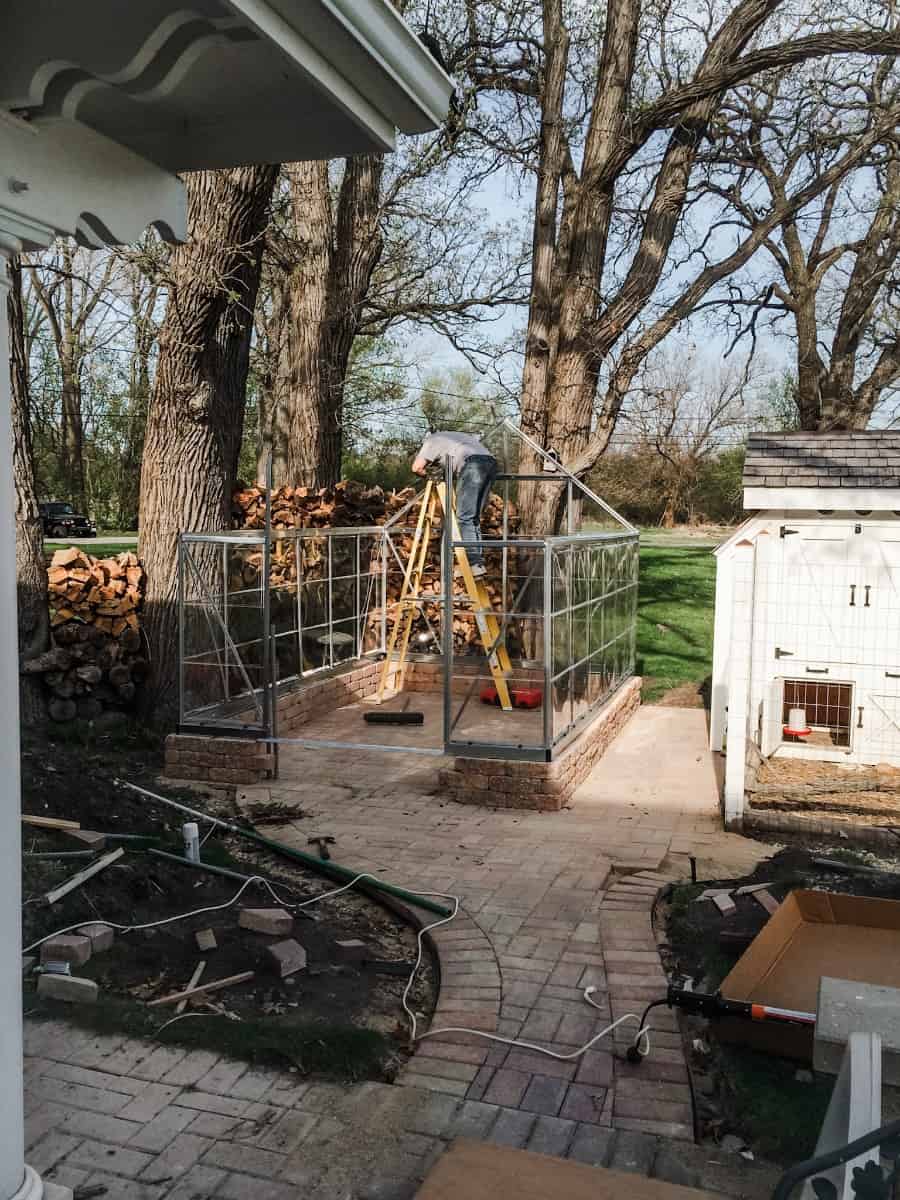
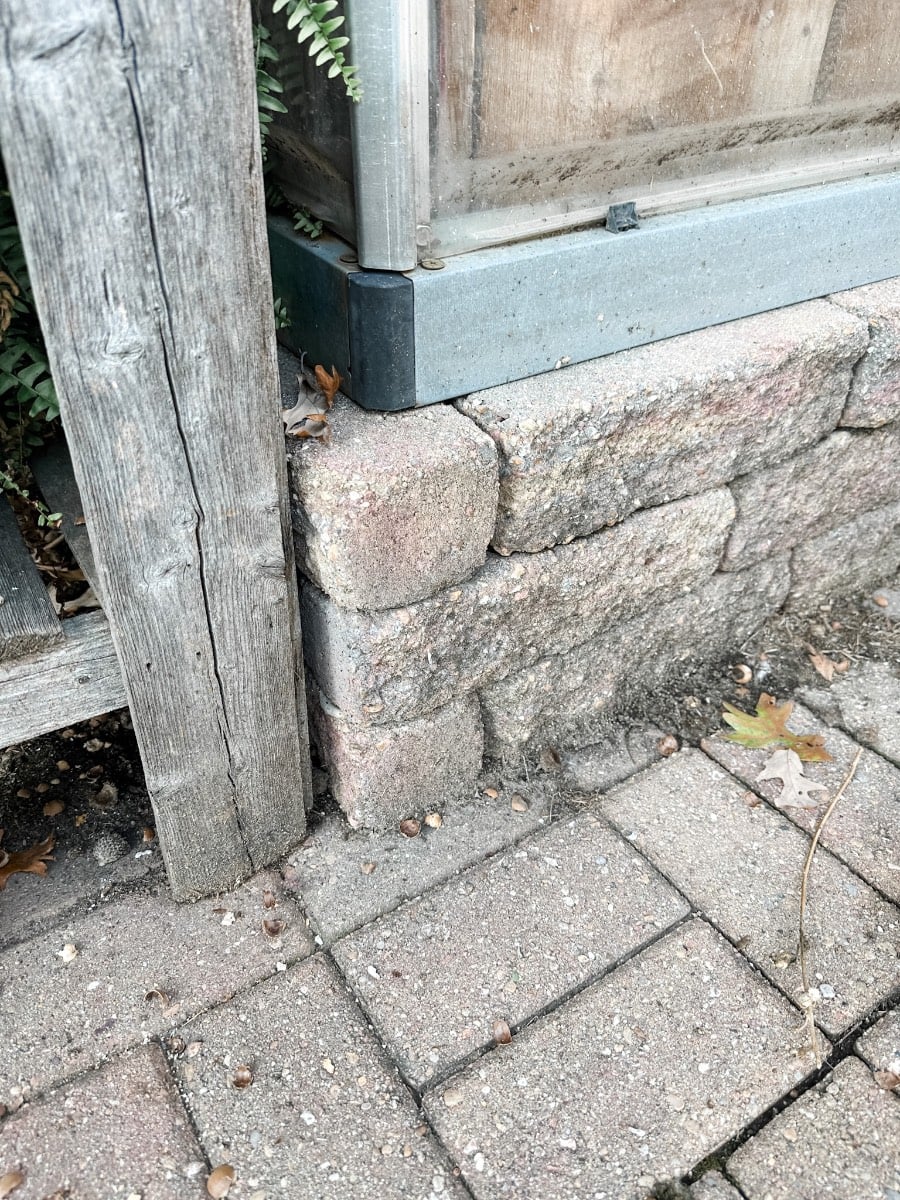
We decided that we would customize our greenhouse with a brick paver floor and then use landscape wall blocks as a base, raise the entire frame 12″ to give us more headroom as well and give it a more attractive, finished look.
Landscape wall blocks are available in a variety of colors and styles, so you can choose ones that match your home’s exterior. They are also very durable and can withstand the elements.
Site Preparation & Foundation
Once we decided that we were going to customize our greenhouse with a brick paver floor and a small landscape wall, the work began.
We excavated the area where the greenhouse was going to be placed by digging an area the size of the greenhouse that was about 6″ deep. You need to make sure that your prepared site is completely level.
Then the area was filled with about 3″ of gravel and was leveled. On top of the gravel, there is about an inch of concrete sand, and this layer is precisely leveled. Once this area was prepared, the brick pavers were laid on top. After you lay brick pavers, you add more sand and sweep it over the bricks to secure them in place.
We used polymeric sand on the top that you sweep into the cracks in between the bricks and then using a hose water the sand down and it creates a solid seal.
After the brick paver floors were laid the landscape bricks were installed on top of the pavers.
We added three rows high, landscape wall blocks to not only give the greenhouse a more customized look but to also add height to the structure.
The landscape walls were secured with Landscape Block and Paver VOC Construction Adhesive.
By customizing your aluminum kit greenhouse with landscape wall blocks and a brick paver floor, you can create a beautiful and functional space for your plants.

Additional Customization
Here are some additional tips for customizing your aluminum kit greenhouse:
- Add shelves or benches to create more growing space.
- Install a water system to make watering your plants easier.
- Add electricity for lights, fans, and/or heaters
- Adding a fan or heater can help regulate the temperature in your greenhouse.
For our greenhouse, we ran electricity to the site it is buried underground and comes up on the inside wall of the greenhouse. We also ran water to the greenhouse but we did it from the outside. That line gets winterized every year.
Another option would be to lay a concrete floor and concrete foundation instead of pavers like we did. However, that would require forms and having concrete delivered.
Assembling & Aligning the Frame
The base of the greenhouse frame was assembled first and the bottom rails were secured to the landscape wall blocks with cement screws.
Would you like to save this?
From there the rest of the greenhouse was assembled.
Because we raised the greenhouse 12″ we had to deal with the doors not being long enough. “Handy” fashioned a flap out of polycarbonate material.
Customizing the Interior
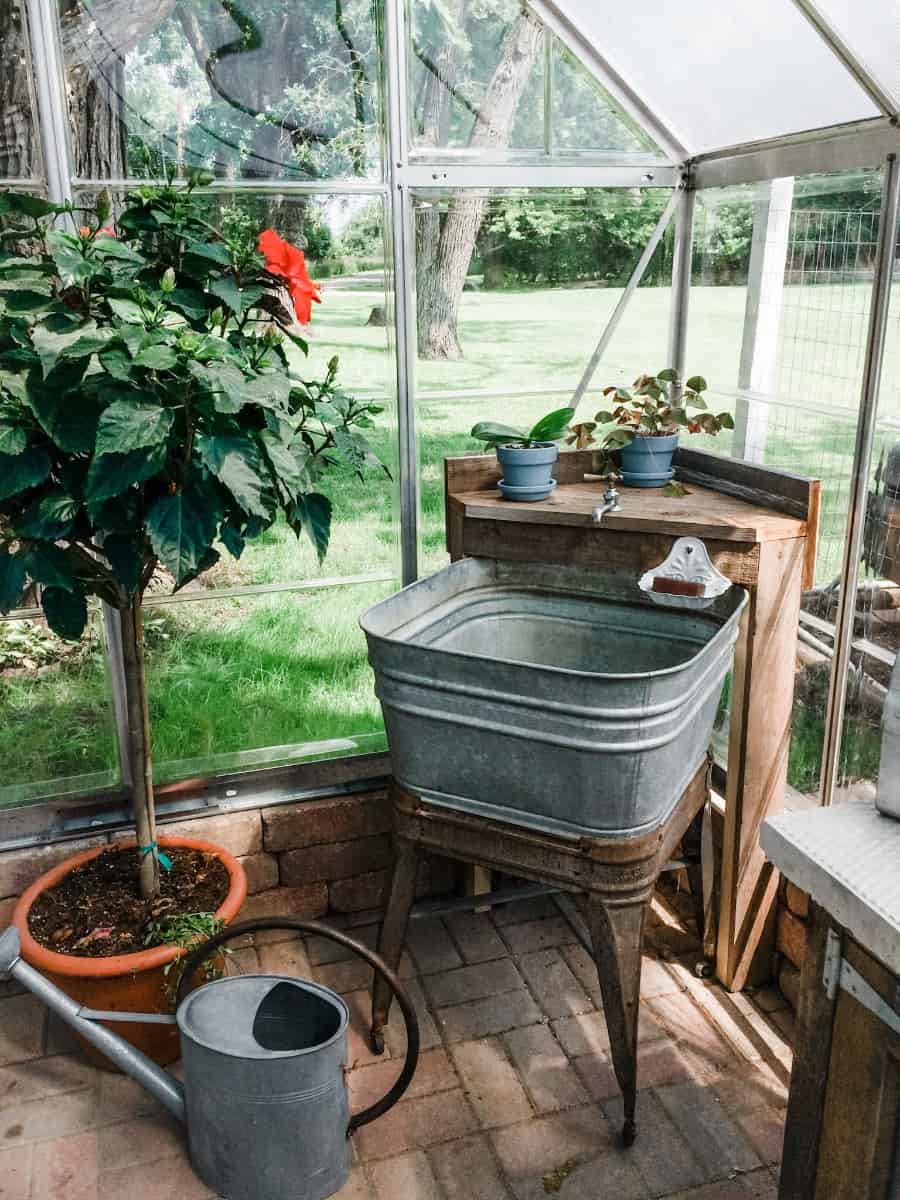
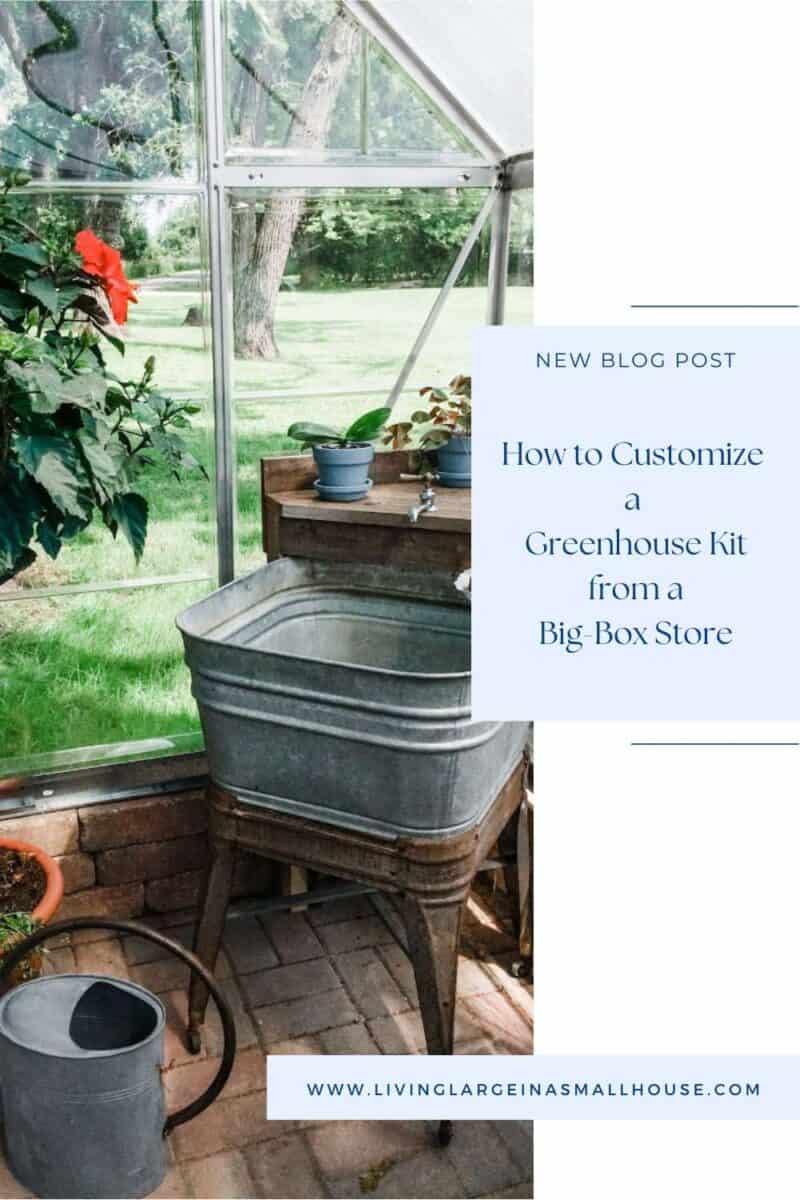
I found a vintage lamp that “Handy” wired into the ceiling of our greenhouse. He also created a sink from an antique washstand.
Lastly, he made a customized potting bench out of pallet wood and steel pipe. In retrospect, I wish it wasn’t so big and that I was able to move it around. Just like my house, I like to add decorative elements in the greenhouse and move things around.
How we use our Greenhouse
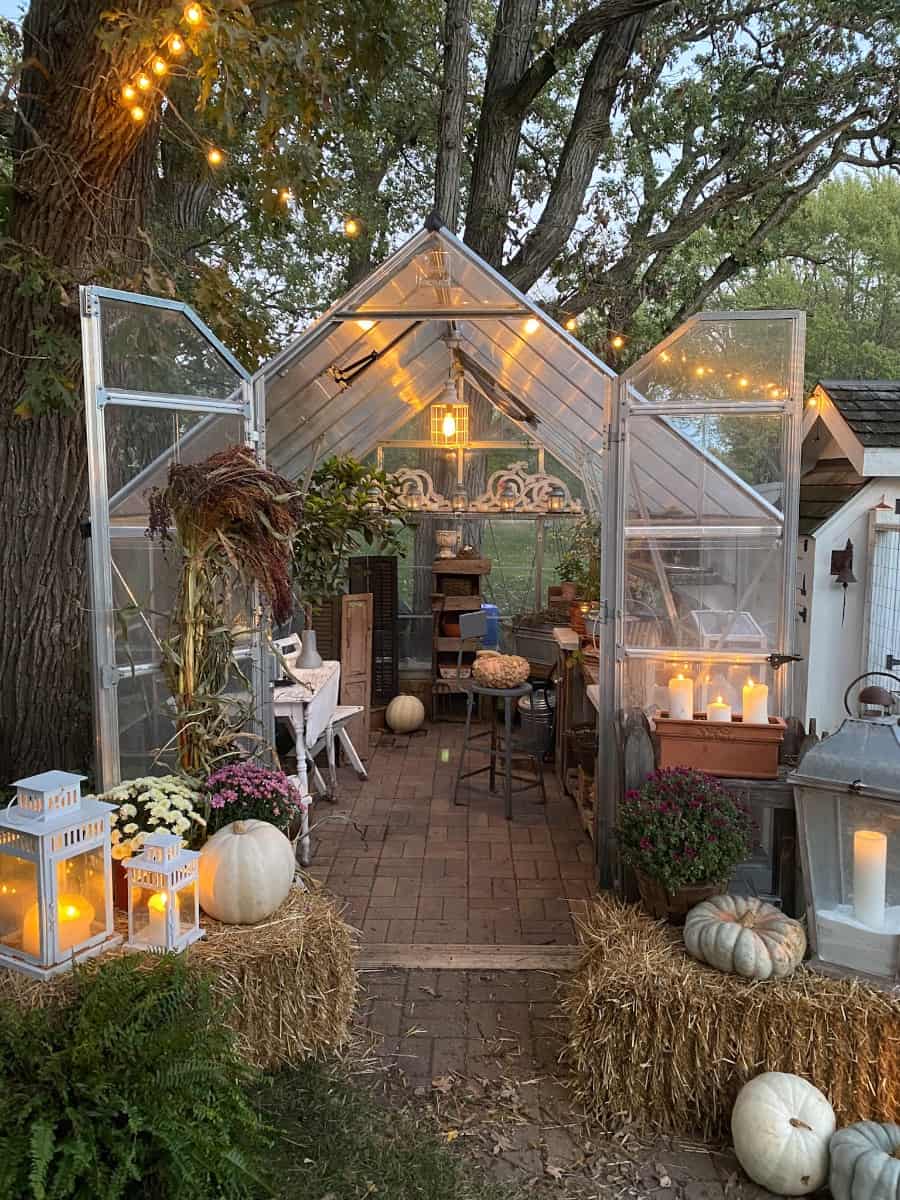
For years the greenhouse was mostly just a garden shed. It housed my gardening supplies and each fall. I would decorate it with straw bales and pumpkins and make it the sight of our fall neighborhood party.
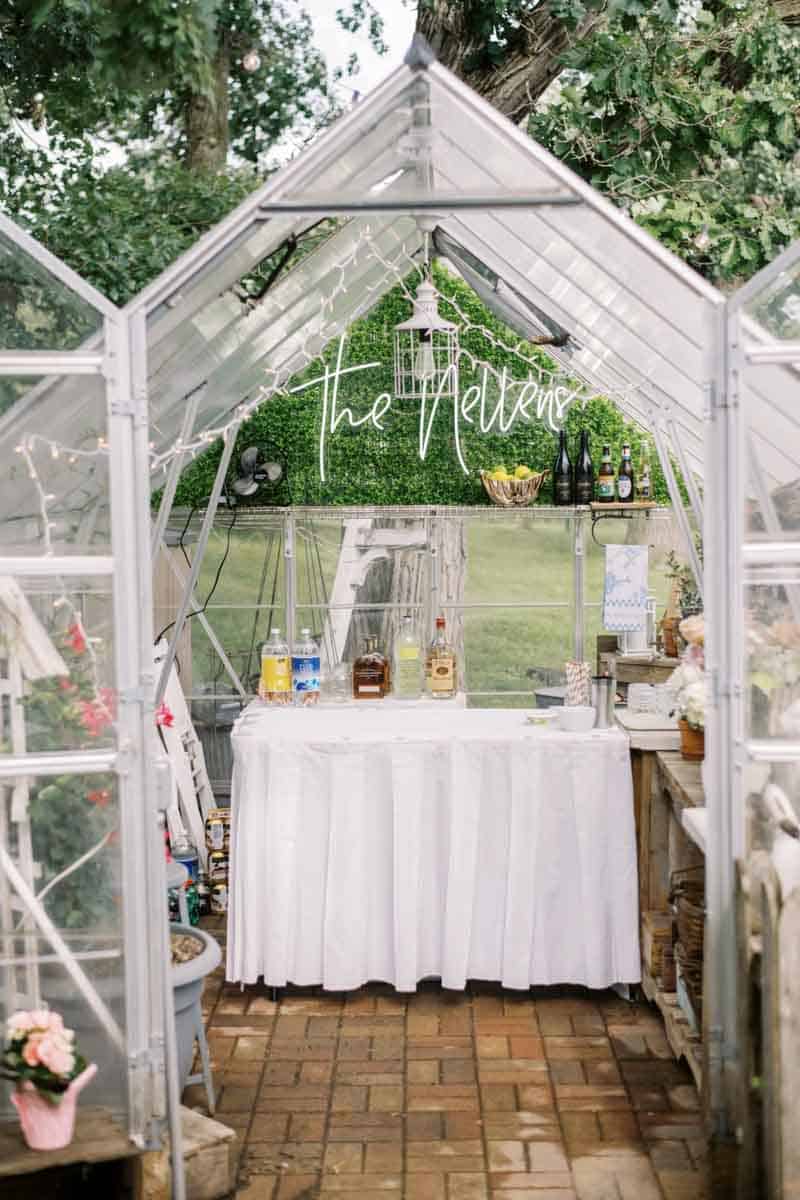
In June of 2020, we made it into a bar for our daughter Annie and her husband Tommy’s Backyard Wedding. This past August we did the same for Kenny and Mila’s Engagement Party.
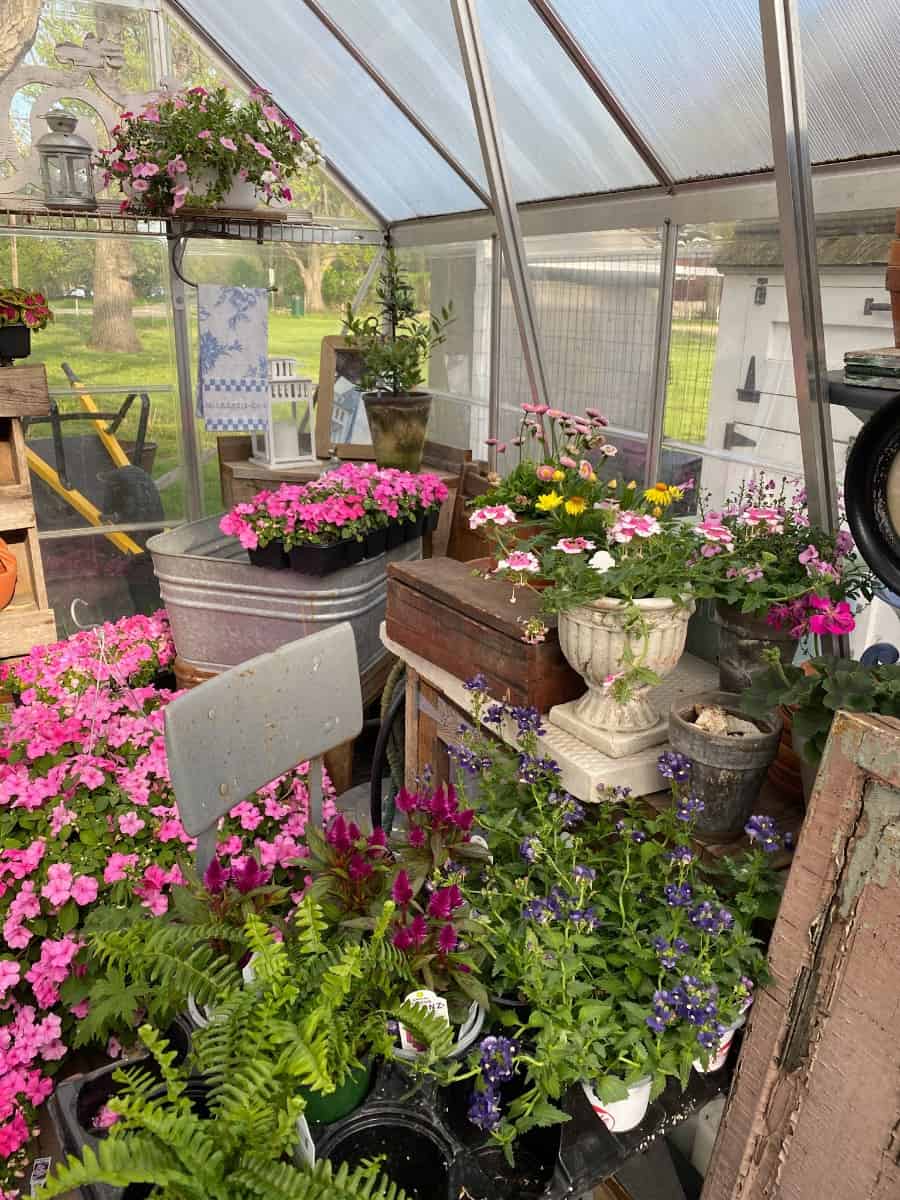
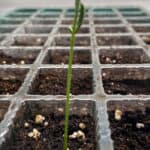
This past year I started seeds indoors and the greenhouse was a great place to harden off my young plants. It’s also the perfect place for delicate plants like basil. Basil is a plant that can’t be put into the ground until much later than the rest of our plants.
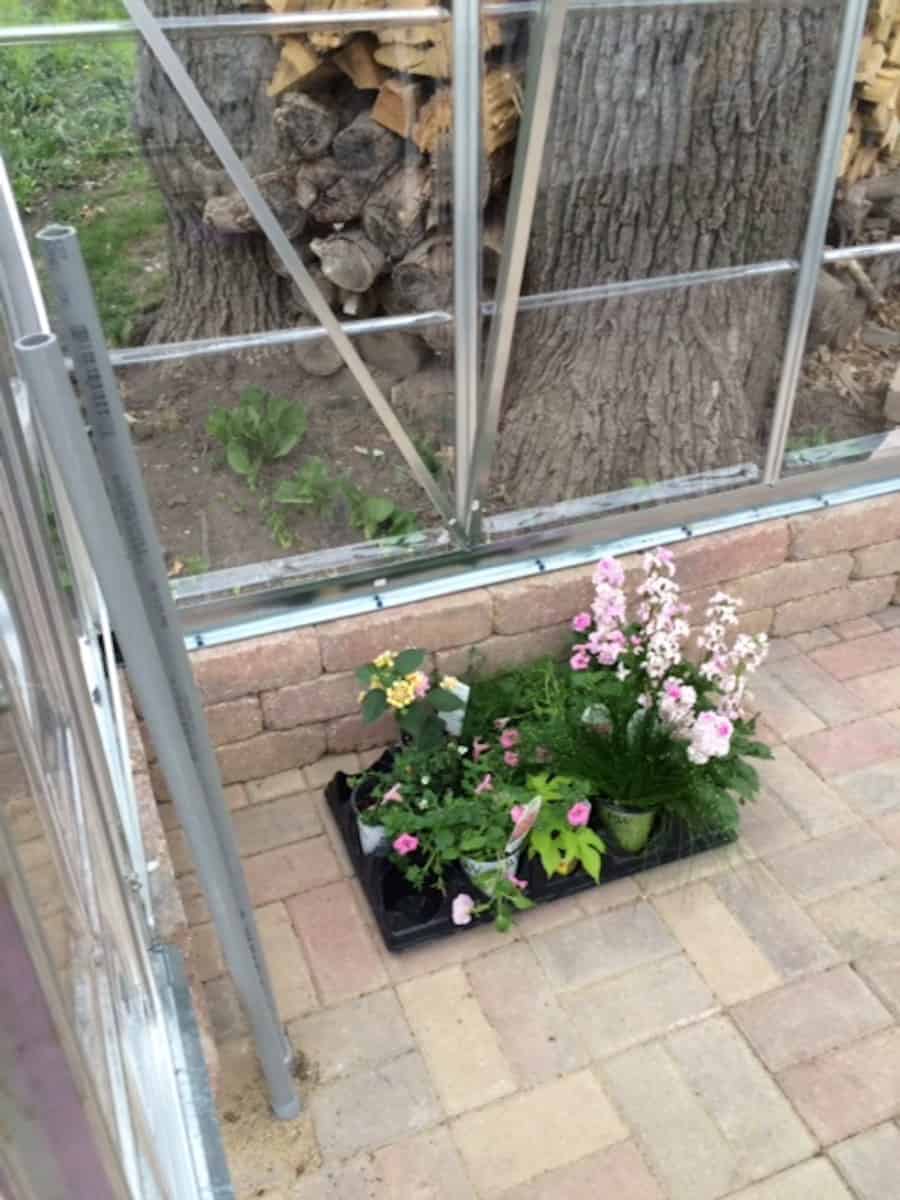
The greenhouse has also been a perfect place to keep the flowers that I buy from the nursery before I can officially plant them on May 15th. It’s crazy but if I don’t buy my plants in April, they are really picked over by Mid-May.
We don’t have a garage, so the greenhouse is where we house things that would typically be kept in a garage. Behind the greenhouse is a storage shed where we keep our lawn mower and snow blower.
While I can’t use my greenhouse as a place to actually start my seeds in the winter/spring; it does the same work as a cold frame. A few weeks ago I started seeds again for cold weather plants. I have some lettuce growing that is ready for me to put out into the garden. I’m hoping to get me another harvest before the first frost.
Next year I plan to start seeds inside again. When the plant roots get too big for the smaller seed cups, I’m going to transplant them into larger containers. Then I’ll move them into the greenhouse. I’m hoping with a heater and plastic sheeting they will survive until the outdoor temperature starts warming up a bit.
Conclusion
Our greenhouse has surpassed our expectations. It has stood the test of time. We built it in 2015 and it is perfect for cold climates. It has survived heavy snow loads, really high winds, and a tree limb or two falling on it.
With a little creativity, you can customize your aluminum kit greenhouse to fit your needs and budget. So get started today and create the perfect space for your plants!
Peace and Love,
Thanks for Following Along
If you enjoyed this post I hope you sign up to be a friend of Living Large in A Small House! Then you won’t miss any of the inspiration that is shared with you each week! You can also follow me on Instagram, Facebook, and YouTube. I share even more inspiration on Pinterest! You can listen to me chat on my Podcast.

A great way to save this article is to save it to your Pinterest boards. You can find the pin button in the top right corner of the photo below. Also, don’t forget to follow me on Pinterest


living large podcast
This week on my podcast I have my better half “Handy” with me as we discuss a controversial DIY project that we did in our house.

Featured