DIY Sweater Pillow: Easy Upcycling Tutorial for Recycling Old Sweaters into Cozy Home Décor
There’s something so satisfying about giving old clothes a second life — especially when they turn into something cozy for your home.
Recently, I found three sweaters at the thrift store that had so much character I just couldn’t leave them behind. My plan? Turn them into a DIY pillow cover.
Spoiler alert: the project didn’t turn out quite how I originally imagined, but I love the finished result even more.
On my blog Living Large in A Small House, I may sometimes use affiliate links, which means a small commission is earned if you purchase via the link. The price will be the same whether you use the affiliate link or go directly to the vendor’s website using a non-affiliate link. You can find my full Disclosure Policy HERE
The Handcrafted Society
Each month, I along with a group of very talented ladies create a project of our own where we repurpose a particular item.
This month we were all challenged to create something by upcycling either or a sweater or boots.
Don’t forget to check out the creations from the rest of the ladies. You’ll find their links at the end of this post.

My Thrift Store Finds
I recently walked out of the thrift store with:
- A cranberry sweater with a cowl neck and buttons.
- A cranberry and gray poncho with fringe and a big metal zipper up the front.
- A cranberry and white patterned sweater with a fun design across the front.
In my head, I thought I’d incorporate the buttons, fringe, or zipper all into a pillow cover, with the patterned sweater as the star of the show. But as often happens with DIY projects, my vision shifted as I worked.

The Pillow Design That Came Together
In the end, I kept things very simple. Instead of using all the features, I went with just a few key details:
- The cranberry fabric and fringe from the poncho for the body of the pillow.
- A strip of the patterned sweater as a decorative band across the middle, covering the seam where the cranberry pieces joined.
- White duck fabric that I had on hand for the back
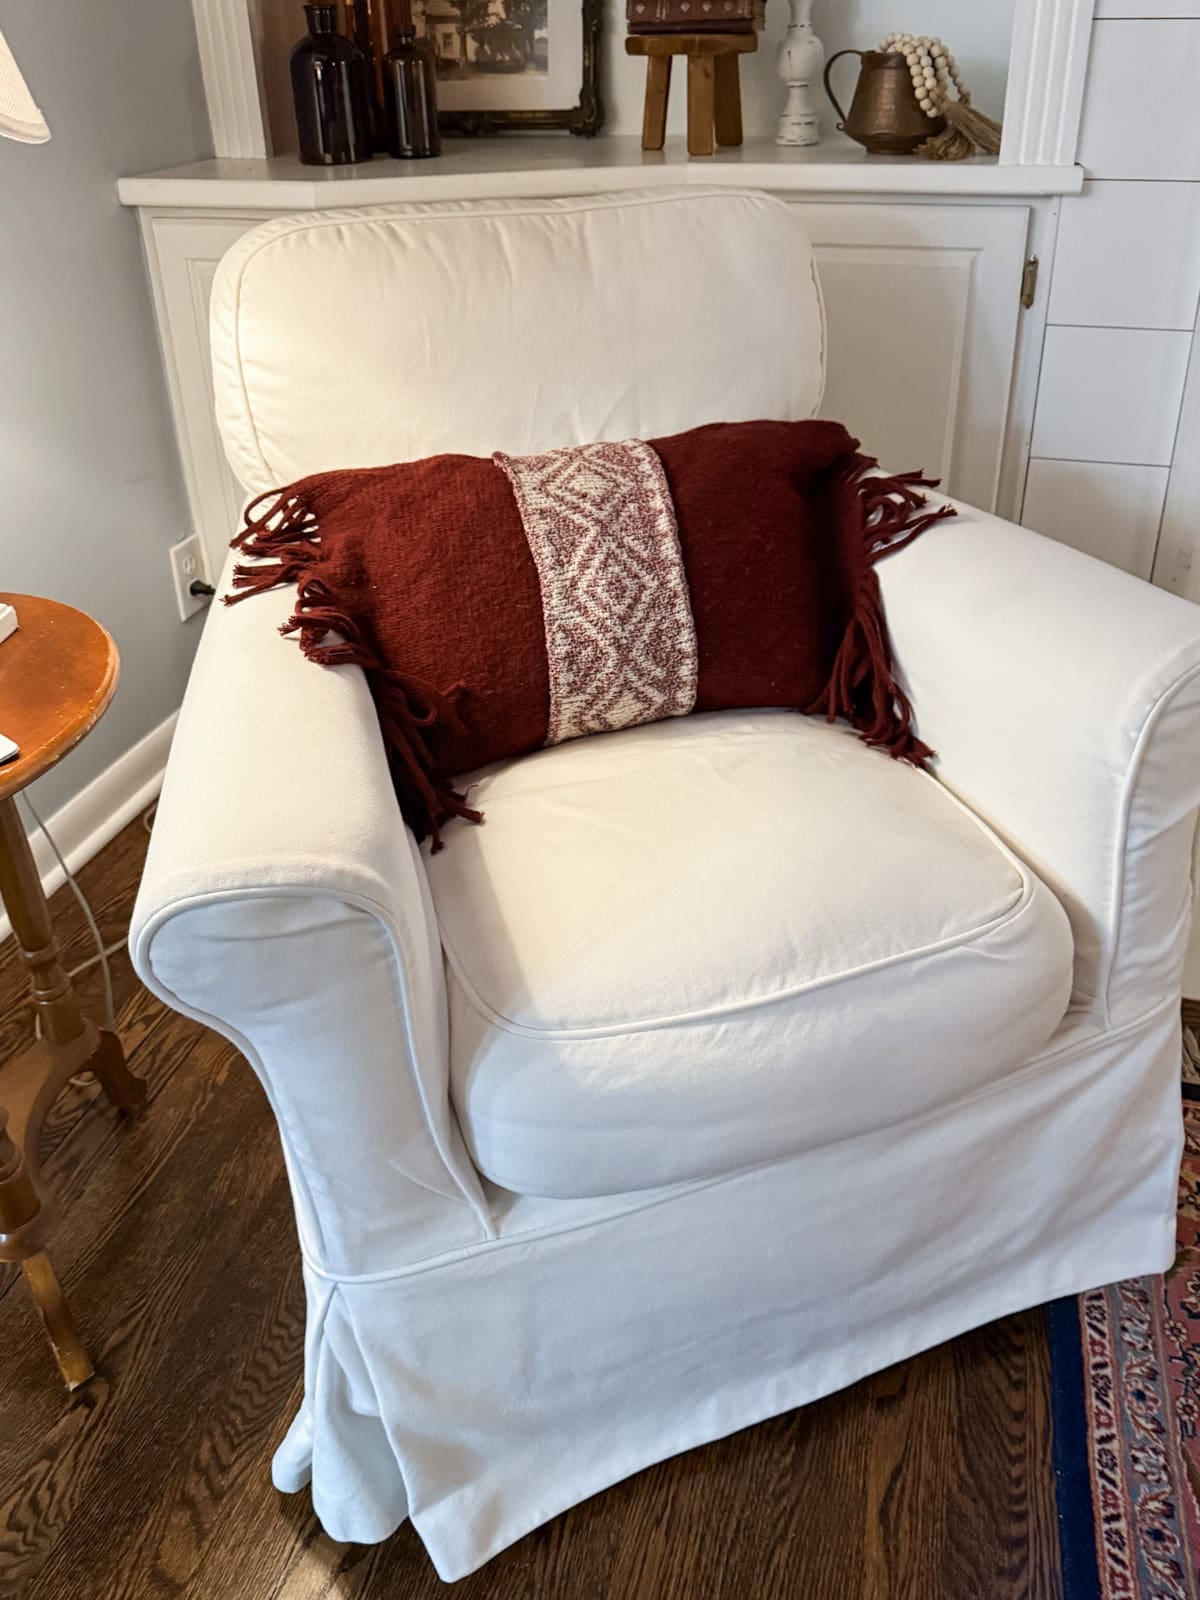
The result is a long lumbar pillow with fringe on each side and a little extra style from the patterned band. I love that it’s subtle but still has those thrifted sweater details that make it unique.

I didn’t use the cranberry cable knit sweater with the button at all for the project and I cut the zipper off the poncho and threw it away.
How I Made It
The construction was really straightforward:
Would you like to save this?

DIY Sweater Pillow
Equipment
- Fabric marker (I used a pencil)
Ingredients
- Old sweater (s)
- Remnant fabric for the back
- pillow insert
Instructions
Cut List
- Front body panels: Two sweater rectangles that, together, cover the full front (plus ½” seam allowance on the cut sides). I used the fringe pieces, but I DID NOT measure the fringe as part of the panel width.
- Pattern band: 1 strip from the patterned sweater long enough to run across the middle of the front, width to taste (mine was wide enough to fully cover the center seam).
- Back (tube style): 1 piece of fabric that is 1/2" wider than the pillow on all four sides.
Instructions
- Step 1: Prep the sweaters: Wash and dry the sweaters in preparation of creating the pillow
- Step 2: Cut the front pieces: When I cut the zippers off the poncho and then cut the gray strip off, I had a perfect rectangle piece that just happened to be the right size for the height of the pillow. It was just too long. I cut out the sweater material that I didn't need from the center, and I was left with 2 pieces of sweater with the fringe on both ends. I hand sewed the center seam and cut off the excess fabric.Tip: If the knit wants to wiggle, pin inside your cut lines before cutting.

- Step 3: Join the front center seam (hand-sew)Place the two front rectangles right sides together. Hand-sew a straight seam where they meet in the middle (a small backstitch works great). Open and press/flatten gently with your hands.

- Step 4: Add the patterned bandCut a neat strip from the patterned sweater long enough to run across the middle of the front. Center it over that seam and hand-stitch around the edges to secure. This is decorative and it hides the join.Neat finish: Use a small whipstitch or ladder stitch, so the stitches disappear into the knit

- Step 5: Hem the duck cloth overlap (machine-sew only this)Press a narrow ¼” fold on both narrow sides of the fabric and stitch that hem on the machine. That’s the only thing I used my machine for.

- Step 6: Build the pillow tube Hand stitch the band to cover the fringed front pieces center seam. I stitched across the top and bottom and then just tacked it down with a few stitches on the body of the main sweater piece.Next I laid this fringed piece with the band—band side up, on a table. I then laid the duck fabric, with the finished side down, on top of the sweater piece. Next I pinned both of the long sides together.

- Step 7: Sew the pillowI handstitched both long sides to create a tube sleeve for the pillow

- Step 8: Insert the pillow

Because my sewing machine doesn’t allow me to drop the feed dogs all the way down, I ended up hand-sewing most of the project. The only part I used my machine for was sewing a neat ¼-inch hem along the raw side of the duck fabric.
I have a heavy-duty Bernina sewing machine that would have worked beautifully for sewing this knit fabric, however, I was at my daughter’s when I created this project and just had my lightweight Brother machine with me.
The Finished Look
It’s not a complicated pillow by any means, but that’s the beauty of it. The mix of sweater textures, the cozy fringe, and the unexpected pop of pattern make it feel special. And knowing it came from thrift store finds gives it that little extra charm.

Final Thoughts
Upcycling sweaters into pillows is such a fun way to experiment with textures and designs. Even if your project doesn’t end up exactly how you imagined, you’ll probably love it even more for the surprises along the way.
Next time you’re at a thrift store, keep an eye out for sweaters with interesting details — buttons, fringe, patterns, or zippers — because you never know what kind of pillow they might become.
Become a Friend of Living Large
And be the first to see affordable decorating ideas, easy recipes, gardening tips and tricks, along with great organizing and entertaining ideas.
Peace and Love,

The Handcrafted Society
Be sure to visit my friends and see what they did with their glass projects!


Meet Me
My name is Lynn. I live in the suburbs of Chicago in a 1,300 sq. ft. home with my Handy husband, Keith.
I’m an open book about my life on my blog. You can find out more about me by visiting my “About Me” page.
No posts


Love the cute pillow Lynn! I’m glad you pointed out how your original ideas, change as you get into a project. Not once have any of my projects go as planned. Some turn out better, and some never see the light of day LOL! Pinning for later!
It never seems to go as planned! I’m glad to hear I’m not the only one.
Love how you upcyled a sweater into this fabulous pillow, Lynn. This color has been so popular in all the fashion blogs this year so it’s fun to see how you’ve customized it for home decor. I love that you can use it from now until the end of the year too! Hugs, CoCo
I’m not a big fan of red, this really is a big stretch for me.
What a wonderful idea, Lynn! I love how your pillow turned out. It’s so true—sometimes we start with one plan in mind, and it ends up completely different, but even better than we imagined. I’m so glad you joined in on the fun. And I had to laugh that everyone picked sweaters and not a single pair of boots!
Thanks for the kind words! I should have picked boots 😂
Lynn, your pillow turned out gorgeous. Love that you found a fringed sweater. How perfect to use it for a pillow.
Thank you Tammy!
Hi Lynn! I adore how you turned sweaters into a comfy, cozy pillow perfect for fall into winter! The fringe is so fun, and the patterned piece pairs perfectly with it. I think it turned out fabulous!
Thank you so much Donna!